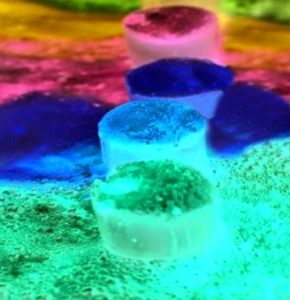
When I was little, I dreamed of making magic potions and colourful experiments! My boys were the same (I still catch them today making some of the recipes and activities on my website). If your child is a budding scientist, try this super simple experiment at home. It glows in the dark and the potion foams into beautiful colours! It is a favourite at our CEFA Early Learning schools.
Best Ages for This Activity
Two to five
How to Make It
Ingredients
- ¾ cups of baking soda per colour that you would like to try
- White vinegar
- Glow in the dark paint (or you can try this less expensive alternative, which you can use on your skin for Halloween as well).
- Transparent cups (drinking glasses are fine, or plastic cups) – 1 per colour you want to try. We did 8 different colours
- A black light
- A measuring cup (if you do not have one, use a spoon and count the equivalent of ¾ cups)
- Squirt bottles (optional – read below)
Let’s Get Started!
- Choose a small, dark room that can easily be wiped down (I like using the bathtub for experiments like this, as it is so easy to clean up). Make sure you can easily close the door and turn off the lights and plug in the black light ahead of time.
- Alternatively, you can do the experiment outside when it is dark
- Turn on the black light
- Invite your child to try a science experiment – making glow in the dark potions!
- Introduce the materials to your child: the paint, the black light, the cups, etc.
- Invite your child to pour ¾ cups of baking soda into each glass container (using the measuring cup for added math learning)
- Invite your child to add three dots of glow in the dark paint to each cup containing baking soda (no need to mix)
- Use as many steps from the scientific method as possible. For example:
-
- What do you think will happen if we pour the vinegar onto our baking soda?
- (Inviting them to form a hypothesis) Will it dissolve? Will the colour stay in the middle of the powder as it is now? Will it make colourful foam? Let’s see! (now test your hypothesis by pouring the liquid into the cup)
- What happened? That was amazing! (share the results)

- You can use anything to pour the vinegar (a little at a time) into the cup of baking soda, but I like to use a squirt bottle, which I use over and over again for many of my activities, so it is a good investment! They are very inexpensive and can even be found at the dollar store. Then you can experiment with squirting a little or a lot of vinegar at one time.
- You can keep going until you run out of vinegar and baking soda (or you can always add more)
- I encourage you to invite your child to touch and feel the “potion” as it is erupting out of the glass – it is non-toxic.
- Have lots of fun playing with this!
Learning Opportunities
This is a fun activity more than anything. It is a great opportunity for your child to practice observation skills and to manipulate the outcome by varying the ingredients. It teaches your child science in the process and math as it has so many opportunities to measure and compare. You have an art component if you choose to do the extended learning as well. Make sure you use as much math vocabulary as you can (for example, measure, count, vary intensity, name the colours, etc. Use descriptive words like slower/faster; more/less; a lot/a few; etc. and use as many opportunities as you can to measure, count and compare.
Extended Learning Opportunities
- Try with the black light on, then off and talk about what they notice both times
- Try with more paint and then less (you can talk about the intensity of the colours)
- Try adding a little dish soap to your squirt bottle (it will slow down the reaction). If you have two squirt bottles, add it to just one of them so you can compare how fast and slow they foam.
- Try on a shallow glass bowl or plate where you can disperse the baking soda at the bottom (about 1 cm high) and then add various colours of the paint in little dots, but on the same plate. When you pour the vinegar on top, you will see it foam in lots of different colours for an amazing effect. Bonus: see how the colours mix and what colour you have left at the end. You can then talk about colour mixing.
- Try placing a large piece of absorbent white paper under your cups before adding the vinegar. Let it dry and see your art piece at the end of your experiment. Try placing the paper on top of the cup (above the foaming bubbles) to see “bubbles” printed on your paper. You can also use paper towel instead.
- Try adding the paint to the vinegar instead of to the baking soda (add vinegar and paint to your squirt bottles) – the colours will be more even and also brighter and more intense.
CEFA tip: Remember to let your child do as much of the process as they are capable of. Ask questions and use math and descriptive vocabulary for added learning (for example, instead of saying “this one is foaming so much” you can say “look at the yellow potion! It is foaming more than the red one We must have added more paint to it!)
Books Your Child Might Like
Toys Your Child Might Like
As an Amazon Associate I earn from qualifying purchases