This is a fun art project that also teaches science when children witness the reaction between the ice and the salt. It is always a hit at our CEFA Early Learning schools, especially during summer camps! It is very simple and inexpensive to do and fascinating for the children – give it a try at home!
Best Ages for This Activity
Eight months to five years
How to Make It
Ingredients
- Water
- Any container that can go in the freezer
- A few drops of gel food colouring (regular food colouring will work as well)
- Coarse salt
- A paintbrush (optional)
- A tray if you have one, otherwise try this outside or somewhere easy to wipe, like the bathtub
Let’s Get Started!
- The night before, pour some water into a large container and put it in the freezer. This will be your canvas.
- Invite your child to try painting on ice
- Together, prepare the “paint”: in separate cups or small bowls, pour a few drops of food colouring and add coarse salt. You can make as many colours as you like, and even mix colours for an added S.T.E.M. component (colour mixing). To benefit from the sensory experience of this activity, encourage your child to mix the salt and food colouring with their fingers. Take your time with this step – you child will learn so much from preparing this salt. Observe and discuss the process as much as possible with your child. For example:
-
- How long does it take for the salt and food colouring to fully combine?
- How many drops of food colouring does it take to achieve an intense colour?
- What colours, mixed together, form other colours we could try? (you can invite your child to rub their hands or fingers together with a little bit of coloured salt in one hand, and a little bit of salt of another colour on the other, and see as they discover with delight what new colour they created)
- How does the salt feel on their hands?
- How many colours would they like to paint with?
- Once all the colours are mixed, retrieve the container with the frozen ice “canvas” from the freezer and take it out of its mold.
- Start painting on your ice canvas and take photos of your child and their painting during the process. Explain that their creation will not last very long because it will begin to melt, but that you can take photos of their masterpiece and immortalise it that way.
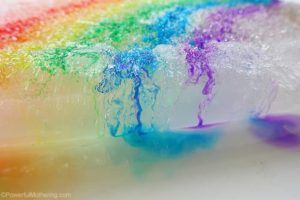
- As your child adds the coloured salt to the ice block, they will notice that the salt begins to melt the ice, forming deep craters in the ice. This will be easy to observe because the colour will penetrate the crater – it is beautiful and fascinating.
- Things you can discuss with your child:
- What do you feel like painting?
- Will you be painting with a paintbrush or use your fingers?
- Do you want to try making a small sculpture instead? Shall we bring a spoon?
- How long do you think your art piece will last before it melts completely? Should we measure how long it takes?
- Once all the colours melt, what colour do you think the water will be?
- Why do you think salt melts ice?
- Where else do we use salt to melt ice? (relate this experiment to real life when in the winter, we salt ice on the streets)
Here is what happens in this experiment: Essentially, the salt makes it harder for the water molecules to bond together in their rigid structure. In water, salt is a solute, and it will break into its elements. So, if you’re using table salt, also known as sodium chloride (NaCl), to melt ice, the salt will dissolve into separate sodium ions and chloride ions.
Learning Opportunities
This is a great way to create a very different art piece, as it is not permanent. It literally changes as your child is painting. It also teaches S.T.E.M., especially if you take the time to observe the reaction as suggested above.
Make sure you use as much math vocabulary as you can (for example, measure time, measure intensity of colours, use words like faster/slower, deeper, on top of, inside, add, etc.) and use as many opportunities as you can to measure, compare, and mix colours. Name all the colours as well. You can make a video of your child doing this activity, which they can watch later and continue building on their learning experience.
Extended Learning Opportunities
- Compare the reaction using fine salt for some colours and coarse salt for others. This will extend the S.T.E.M. learning.
- See what happens if you use watercolours (and no salt) instead of coloured salt. This will extend the S.T.E.M. learning.
- Find out what happens to the salt when we salt the streets? Where does it go? Discuss how it is not good for the environment. Did you know that chloride is very bad for the environment? It can kill aquatic animals once it gets in the water. This in turn affects other animal populations that rely on those sea creatures for nourishment. Chloride also dehydrates and kills plants and can alter soil composition, making it harder for vegetation to grow. While some other compounds that can melt ice and snow don’t include chloride, they are much more expensive than sodium chloride or calcium chloride (which is generally what is used to de-ice the streets in the winter). Figure out what can be used instead, and omit as a family to find alternative ways to melt ice in the winter, figuring out the pros and cons of other method (for example, melting the ice with hot water will work and will not affect the environment, but it also becomes very slippery ice once it freezes again. Heated driveways are a great way to prevent ice from forming in the first place, but they may be expensive to build, etc.) This will teach your child to contribute and to be responsible by helping preserve our marine life and environment. It will also teach your child to problem-solve and come up with solutions, which furthers S.T.E.M. learning and creativity.
Books Your Child Might Like
Toys Your Child Might Like
For 6 months +
For 1+
For 3+
As an Amazon Associate I earn from qualifying purchases