This is a great summer S.T.E.M. project that we do at CEFA Early Learning schools every year as part of our engineering program. It is quite easy for you to do at home with your child, it requires very few materials and it really works! Once you have built your solar oven, you can cook s’mores or even pizza inside it, and your child will feel the satisfaction of having built something useful all by themselves.
Here you will find a simplified version of the S.T.E.M. challenge we present at our CEFA Early Learning schools, which involves more steps, more collaboration between children and working as a group, more reasoning, trial and error and planning.
Best Ages for This Activity
Three to five
How to Make It
You Will Need
- A pizza box or other similar box
- Aluminium foil
- Plastic wrap
- One sheet of black paper (construction paper is fine)
- A wooden skewer or any stick (to prop the box open)
- Tape
- An x-acto knife (a paring knife works too)
- S’mores ingredients (graham crackers, one Hershey’s Bar or other chocolate and marshmallows)
Let’s Get Started!
- Invite your child to build an oven that can cook food using the energy of the sun
- As we will be using solar power, it is a great opportunity to talk about the Earth, and about conservation and wise use of energy resources. Your child can learn more about the energy of the sun in the video below:
- The concepts may be a little complex, but you can pause and explain as needed and depending on the interest level of your child. This can be done before or after the activity (even a few days after).
- Apply the engineering design process:
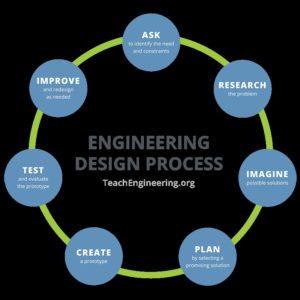
- Ask: How can we design a container that will use the energy of the sun to heat food?
- Research: How do ovens work? How would a solar oven work? (A solar oven works by absorbing more energy than it dissipates) How could we capture the energy of the sun?
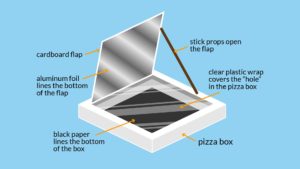
- Imagine: Figure out a prototype – a way to build an oven that you think will work (here you can look at all the materials to use: the box will be the “oven”, the black paper is placed beneath to absorb heat, the aluminium foil is placed on top to reflect the sunlight into into the box, and the plastic wrap is to enclose the oven (once the food is in) so it keeps the heat in but lets the sunlight pass through.
- Plan: How could you build that oven? You can draw your prototype if you wish, or work with the materials to create a plan
- Create: Build your solar oven.
- Test: Try your oven by cooking s’mores or a mini pizza in it, to see if it works!
Here are some instructions for building your solar oven:
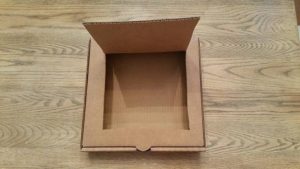
- Cut the lid of your pizza box as shown in this picture:
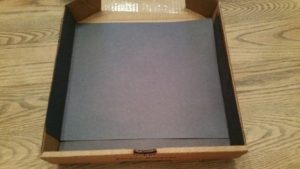
- Cover the bottom of the box with black paper (this will retain the heat):
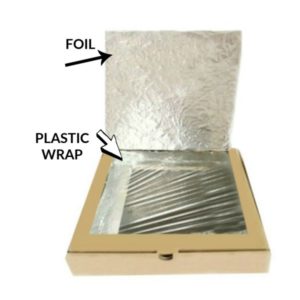
- Cover the lid of the box with plastic wrap and the top with aluminium foil as shown in this picture:
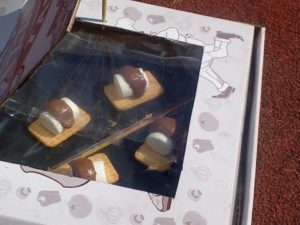
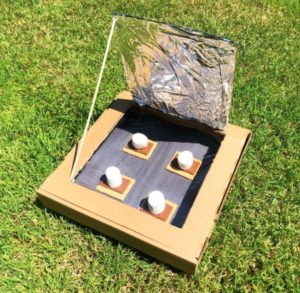
- Now you can try your solar oven. Prepare your s’mores and put them inside your new solar oven (this may take 1 hour so get your timers ready for you children to measure time. Also add a thermometer inside the oven so they can see the temperature rise and measure that too – all great for math skills). Leave the aluminium-covered lid propped up (use the stick for this) so it works by reflecting the solar energy into your oven (see pictures below):
Learning Opportunities
This is a fun S.T.E.M. activity where your child can learn engineering (building and testing a functioning oven), math (measuring temperature, measuring time, geometry while cutting the box to specific measurements, angling the lid, etc.), technology (working with chronometers, working with tools, etc.) and science (especially melting marshmallows and chocolate, and cooking whatever else you decide to cook with your new oven). Following instructions will also teach them math and reading. Using solar energy will teach them about the environment and the Earth, as well as spend time outdoors.
Use as much math language as possible, introducing words like fast; slow; faster/slower than; hot/hotter, warm/warmer, cold/cool, etc.; high, low; higher/lower than; numbers; height; temperature; centimeters; millimeters; angle; measurement; etc.
Extended Learning Opportunities
- Invite your child to modify their oven and test it to see what works faster and what works slower. For example, try covering the entire box in aluminium foil to see if it works better than black paper at the bottom, or try not covering the top with plastic wrap and seeing what difference it makes. You have two ways to compare results: through measuring temperature and through measuring time to cook. You can even make several ovens at once so you can compare them beside each-other.
- Try cooking different foods like pizza, or cookie dough.
CEFA tip: Remember to wait long enough for your child to “figure out” what is happening, or how building it this way and that might yield better results. They will learn much more and understand it much better than if you rush in to explain the concepts to them. Give sufficient time for them to explore the materials without your involvement after each experiment. Don’t intervene if they use the materials in a different way, or if in the middle of the experiment they feel like doing something else entirely with the oven (they might decide melting a crayon is more fun). It is all part of the learning experience. Just come back to the experiment when they are ready.
Books Your Child Might Like
Toys Your Child Might Like
As an Amazon Associate I earn from qualifying purchases