
Glittery Sensory Calming Bottles
These bottles are mesmerizing for babies and children of all ages! They are used by schools and therapists to help children self-regulate when they are feeling anxious or overwhelmed. Older children also use them for the same purpose, and even adults.
Once you make it (older children can help you make them), leave it by a window so your baby can play with it anytime. You can also bring it out if your baby is feeling anxious, overly tired or overwhelmed. They will watch with delight as the sparkles swirl and shine the light! They also make beautiful shadows for light play, which is a favourite activity for children younger than 3.
You can make these bottles with a non-breakable plastic, but with supervision, I recommend the glass ones for babies to explore. It is an easy activity for indoors or outdoors, and is not messy.
Best Ages for This Activity
Amazing (and I would say essential) for newborn to 2-year-old children, but great for children of all ages!
How to Make It
Supplies
- One VOSS water bottle. Things to keep in mind:
- Gold glitter glue (or whichever colour you prefer – I am making the beautiful sunset bottle on the very right). You can also add extra glitter and just use clear glue
- Yellow food colouring
- Gold glitter of various sizes or whatever colour you prefer from this set
- Super glue
Optional Supplies
- A large glass measuring cup (you probably have this in our kitchen already) or glass or metal mixing bowl with a spout (to make it easier to pour)
- A whisk – these ones are great if your children will be helping you make this or cook in the future
- If you used the gold glitter of various sizes, you could add orange and red glitter to the gold to make it more like a sunset, but really, use any colours you and your child prefer.
- Goo Gone to remove the glue from the label of the bottle, if needed, once you peel it off. I soak my bottles in boiling water and dish soap and most of the time I can remove the residue without using Goo Gone, but some are harder than others.
Let’s Get Started!
CEFA tip: You and your child will be working with hot liquids, so do not use a plastic container to mix them. If you use a plastic bottle for the end product, you will have to wait until the liquid has cooled off before pouring or it will melt or warp your bottle.
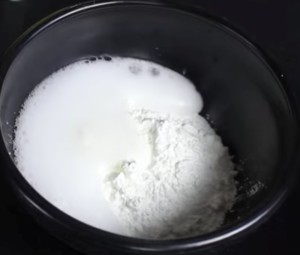
- Empty your glass bottle, wash well and remove all labels. To do so, you can use hot water and then Goo Gone to remove the glue.
- Pour 1½ cups of boiling water into your large measuring cup. You should always do this part so your child does not get burnt.
- Add ½ bottle of glitter glue or clear glue to the boiling water
- Add ½ cup or more (to your liking) of your gold glitter to the mix. It looks much, much better if you add a mix of different glitters such as fine glitter, glitter shapes (hearts, large circles, stars) and regular glitter rather than just one kind.
- Add the orange and red glitter to your liking.
- Add two drops of yellow food colouring (only two).
- Mix everything really well using a whisk or even a fork or spoon and pour the mixture inside the water bottle.
- Top the rest of the bottle with cold water, leaving 10cm without filling.
- Close the bottle tightly and shake it vigorously. Let it settle and decide if you would like to add more water, more food colouring, or more glitter.
CEFA tip: If you would like the sparkles to move more slowly, you can add dish soap instead of more water to top off the bottle. Just add a little at a time until you find the perfect consistency. If it looks murky, it will settle in 24 hours or so.
- Once you are happy with the results and your bottle is full to the top, dry the bottle and the lid, and glue it shut using the super glue.
Let’s Play!
- Show the bottle to your baby, shaking it for them to see its beautiful shimmery colours in the sunlight.
- Leave the bottle where your child is playing so they can explore it on their own time. See if they try to shake it or roll it.
- Play with your baby, and introduce vocabulary words like: glass, hold, stand, roll, shake, light, sparkle, glimmer, sparkle, scintillate or shimmer, and math words like gold, red, orange, yellow, cylinder.
Learning Opportunities
Babies will learn S.T.E.M., especially science and math as they study light and motion. If your children were old enough to help you make the sensory calming bottle, they also learned to measure, pour and transfer. They will mix and shake vigorously as well, putting their fine motor skills to work, which are essential for writing.
CEFA tip: Remember to let your child do as much of the process as they are capable of. This means they pour, and they mix, but make sure you mix first to ensure that it is not too hot.
Extended Learning Opportunities
- Place your bottle near a window at different heights to see how the colours shimmer on your floor. Can your child see the movement?
- Teach your child other ways to calm their body, like deep breathing, resting, or practicing yoga.
Things to Keep in Mind
Please keep in mind that children always need adult supervision, and that this activity involves boiling water.
Click the images below to see where you can purchase these items.
Toys and Educational Material You Might Like
For 1-5+ year old children:
Books You Might Like
For 1-5-year-old children:

Learning outcomes defined through colours
If you have been following our games, you may have noticed that some words are highlighted in different colours. The colours have a purpose– they represent the four pillars of the curriculum used at CEFA Early Learning schools. I founded CEFA Early Learning 25 years ago and it hasn't stopped growing.
I designed the CEFA curriculum in 1993, and since then, I have been working on each of the disciplines, updating the content based on all the research I do and on observing the students at our schools. I love writing curriculum and games!
If you see a word in blue, you will know that it is teaching your child S.T.E.M. skills. This curriculum teaches your child the skills to think outside the box, innovate, problem-solve and think creatively, amongst other things.
A word in pink means the activity is contributing to your child’s literacy skills. This curriculum teaches your child the skills needed to read and write, acquire math language and a second language – this is often what you find in “traditional” schooling.
A word in orange means the activity is contributing to your child’s artistic skills. This curriculum teaches your child creativity and innovation through exploring the arts. Art is sometimes included in the S.T.E.M. curriculum – called S.T.E.A.M. because it also teaches your child to use creativity.
A word in green means the activity is teaching your child mindfulness, compassion, citizenship, contribution, and kindness. These are not typically topics included in a school curriculum, but I find they are essential in a curriculum. I believe this part of the curriculum fosters the skills needed to change the world, to make a difference, to be an amazing human being.
Every skill that your child learns through our games and activities is not purely one skill (for example – math). It’s several skills combined. One activity can teach art as well as S.T.E.M. as well as literacy, and citizenship, all in one activity.
It’s great when parents know what skills their child is learning. I enjoy sharing with you to give you an idea of how and what your child is learning. For a more in depth understanding, check out below!

Why Do Some Things Glow in The Dark?
Children are fascinated by things that glow, especially in the dark! The question you will invariably get asked is: How does it glow in the dark? Here is a simple explanation you can share with your young child:
Things that glow in the dark contain a substance called phosphor. Phosphor can radiate light after it has become energized. To become energized, they soak up light energy for a long time, and then they radiate light in the dark.
Very simply put phosphors “store up” light energy and then radiate it.
What Is Luminescence?
It is a process that occurs when a substance emits light without heat. It does not have to “glow in the dark”, it just has to give off light by itself. This is different than the light we get when we burn things (like wood for example) – this type of light results from the heat. There are a few different types of luminescence, including phosphorescence and bioluminescence.
Fluorescent substances absorb ultraviolet light and then glow when they re-emit it.
Phosphorescent things have phosphors, and they make light the same way as fluorescent things do, but they can glow for a longer period of time after the light is gone.
All things that glow in the dark have phosphors. There are many different kinds of phosphors.
Some living things and even objects, glow when we shine a black light on them. When the light waves of a black light hit an object that contains phosphors, it will naturally fluoresce (glow).Did you know that some plants or animals are also luminescent? They use a chemical process called bioluminescence. They have a special enzyme that convert stored energy into light (without creating heat) which makes them bioluminescent. Here are some animals you may recognize:
A note from Natacha: Parents, please watch the video first without your child and decide whether it is appropriate to watch with them. You may want to watch some on mute, and discuss with your child what they are seeing instead. I provided some links to videos so children can see how these animals are and act, which is much more information than seeing a picture only, but I did not make these videos and therefore am not responsible for their content. Use your discretion.
Fireflies
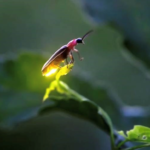
You can see them in this video
Moon Jellyfish

You can see them in this video or at the aquarium!
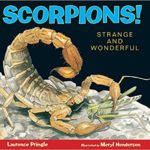
Scorpions
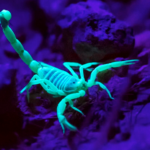
You can see them in this video
Glow Worms
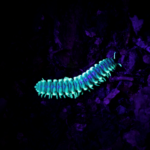
You can see them in this video
Anglerfish
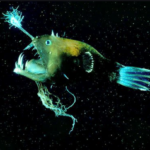
You can see them in this video (watch first as it may be too scary for younger children)
Some amphibians

You can see them here.
Some Sharks

You can watch them here.
Some Corals

You can see them in this video
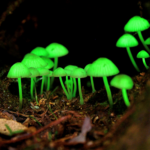
Some Mushrooms
Magical Glow in The Dark Goop
This incredibly simple science experiment will keep your child entertained for hours and will take just a few minutes to make! It offers great fine motor skills as it can be a little difficult to mix, and is very intriguing to children because the goop has the consistency of pasta dough when you are handling it, but the minute you stop moving, it liquefies. If you start touching it again, it hardens, and again if you stop moving, it becomes a thick liquid and drips out of your hands – fascinating!
This is an activity that is inexpensive to make and thrilling for children. Plus, you can store it in a mason jar or any other reusable container, so you get several days of play out of it! This mixture is safe if children happen to put it in their mouths but, of course, you should avoid when possible.
How to Make It
Supplies
- A large spoon
- ½ cup of corn starch
- ½ cup tonic water
- A black light or black light flashlight – I know that this is a little bit of an investment, but a black light is fascinating to children, offers hours of play, and can be used for many, many other activities I will be posting.
Let’s Get Started!
- Your child can measure and put the cornstarch in a medium bowl – preferably a glass bowl so your child can see what is happening better.
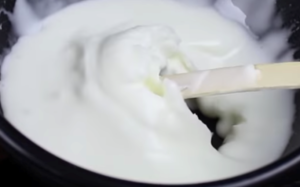
- Your child can slowly add some tonic water to the mixture, observing what happens, and stirring with a spoon (the larger the spoon, the easier it will be for your child to stir.) The mixture will be quite hard to stir so you may need to help. This magical goop gets hard when it is handled, then soft when left alone. It will look something like this:
- When it is finally completely stirred, it will have the consistency of pizza dough. If not, adjust the proportions of cornstarch (to make it more solid) or tonic water (to make it more liquid)
Let’s Play!
- You are now ready to play! Plug in the black light above the play area (best to play with it in a room that you can make darker by closing blinds and turning off the light) – a bathroom is ideal. Now prepare to be amazed by this goop!
- Your child can hold it and play with it as if it was play-dough, but as soon as they stop moving their hands, they can watch as the goop magically turns into a liquid and goes back in the bowl!
Learning Opportunities
Children will learn S.T.E.M., especially science as they prepare the goop and math when measuring. They can learn about what solids, liquids and gas are (you can show them that the bubbles in the tonic water are a gas). They can learn about black lights and what makes things glow in the dark. I've prepared an easy explanation for you here. They will also be putting their fine motor skills to work, which are essential for writing.
CEFA tip: Remember to let your child do as much of the process as they are capable of. This means they pour, and they mix!
Extended Learning Opportunities
Now that your child has had the opportunity to work with a black light, find other things that glow in the dark:
- Clothes
- Toys
- Teeth
- What else can you find?
Watch some of the videos I suggested in my learning file to see how some animals are bioluminescent, and talk about those!
What else was your child interested in related to this game? Extend the learning by following their curiosity! If you need help with new games, simply leave a comment and I will try to send you ideas for you and your child.
Things to Keep in Mind
Make sure you do this experiment on a surface that is easy to wipe.
Toys and Educational Material You Might Like
Click the images below to see where you can purchase these items.
For 0-3 year old children:
For 3-5 year old children:


Books You Might Like
For 2-5 year old children:

7 Simple ways to help your family rediscover nature
It took you a while to get your child dressed and fed in the morning, but you are finally ready to go, and if you hurry just a little, you will make it on time for the puppet show at the library.
Your child, however, seems to be in no rush to get there. They want to look at the flowers from your neighbour’s garden for the fifteenth time this week, pick a slug up and ask it all kinds of questions (and you forgot the disinfecting wipes), and catch every puddle on the way, not just to splash around in it, but to figure out how the sky is inside that puddle, as well as above.
Your level of frustration rises. You explain to your child hurriedly that what they see in the puddle is called a reflection, and gently tug them along, hoping to at least catch the end of the show.
You try so hard to be a great parent and organize learning activities, and it seems impossible to make it all happen smoothly. Why is it so difficult to get from point A to point B with a young child?
The answer is simple: for your child, everything is point B. They are in no rush to get anywhere, because where they are at that moment is exactly where they feel they should be. As adults, we have forgotten to live in the moment, and to truly take in the world around us. For efficiency’s sake, we are planning dinner on the way to the grocery store, we are texting work during story time, reviewing our e-mail while our child is breastfeeding, and saving time anywhere we can.
Over the years, we teach our children to be efficient like us, but with this great time-saving lifestyle, we are robbing ourselves and our children of the amazing experience of being present, of discovering the world around us, and feeling its incredible energy. Our mind is constantly thinking, and we have lost touch with ourselves. This way of life erodes our health and has devastating effects in our children. The solution? Focus on the now, be present. And the easiest and best way to do that is to spend time in nature.
Nature is the perfect environment for children to feel happy. Spending time outside, surrounded by trees, plants, water, flowers, birds, and fresh, clean air, not only improves their immune system, it also significantly reduces stress, inspires creativity, brings peace of mind, and significantly improves school performance at every age.
Although organized activities like the ones at your local library are important, your child is learning just as much on the way there as when they have arrived. In the early years especially, children’s learning experiences take place during these moments. They learn a great deal from jumping in a puddle and figuring out why their boots are suddenly filled with water (much to your chagrin), or from trying to catch a bird before it flies away, or even (sigh) putting both hands in the mud and feeling how squishy and cool it is. A worm or two offer hours of delight and seeing a leaf fall from a tree in a marvelous dance sends your child twirling and squealing with bliss.
It is essential for your child’s heath (and yours), that they spend time outdoors, surrounded by nature at least fifteen minutes every day. It does not have to be an elaborate outing, in fact, the simpler, the better – here are 7 simple ways to help your family rediscover nature.
1. Go for A Walk with No End in Mind
Make it a habit to go for a walk as a family every day for at least fifteen minutes. Don’t think of going to the park, or to the store, just enjoy the walk itself. Younger children will find plenty of entertainment along the way – take the time to listen to them, and ask them open questions, like “I wonder where the rain comes from” or “I wonder where ladybugs sleep”. Don’t rush in with the answer, let your child think about it, and figure it out together. You can bring a little notebook to write down all the questions you came up with and research the answers once you get home.
2. Go for A Family Bike Ride
The wonderful thing about a bike ride is that it helps you spend time as a family, but also allows for time alone. Because it is not always easy to carry a conversation, we each have some time to enjoy silence as well. Having a quiet mind is just as important as having an active one. In fact, research shows that quieting our mind (thinking about nothing) enhances our ability to think and problem-solve when we need it. Bike rides are especially great when children are going through a difficult time, or through adolescence, and need more than ever a connection to both nature and their family.
3. Find Nature Around Your Neighborhood
In Vancouver, we are very fortunate to live in a province where nature is all around us. We can go for hikes, walk along the ocean, or even enjoy nature right in our backyards. If you can, choose a place to live where you are surrounded by nature. If you prefer the city lifestyle, find the areas around your neighborhood where your child can be surrounded by green space, climb trees, have picnics, build forts, observe animals in their natural habitat, or dip their feet in the water.
4. Bring Nature to Your Home
When outside, you can collect insects in small aerated jars or aquariums and build a natural habitat for them at home for a few days. Observe how they live, what they like to eat, and how to care for them. Caterpillars, ants, worms and snails are wonderful to observe! You can also bring flowers and plants inside (with roots), care for them and observe how they grow. Edible plants, like mint, or roots, like carrots, are a wonderful opportunity to teach your child where food comes from and how to grow it.
5. Plant A Garden or A Tree
You can plant a small edible garden at your home, or even a fruit tree, and teach your family to care for it. It is incredibly rewarding for your children to grow their own fruits and vegetables and be able to share them at mealtime with their family. If you do not have the space, there are plenty of community gardens where you can do the same, or you can have something smaller at home, like an herb garden. Flowers are also incredible to watch and nurture. If you pick a flower outside, show your child how the flower keeps drinking water by adding a few drops of food coloring to the water, and watching as the flower turns that color!
6. Add Natural Elements to Your Child’s Play Space
Ensure your child’s outdoor space at home and at school has rocks, branches of all sizes, water, sand, plants, trees, and other natural elements for your child to play with and build with.
7. Get A Family Pet
Nothing teaches children empathy better than having the opportunity to care for a pet. A dog will ensure that your family goes for walks at least twice daily and is eager to give and receive love. If you are not quite ready for that commitment, there are plenty of other options – from cats to caterpillars – that will do the trick. Make sure that your family learns how to care for your new pet before taking one in to ensure you are capable to give the pet the proper care that is needed for a good quality of life.
The benefits of spending time in nature each day are life-long, not only for your child, but also for you. Research shows that spending time in nature decreases depression, anxiety and fatigue, and increases the ability to focus, as well as improve creative thinking and clarity of mind. Next time you are going somewhere, leave a few minutes earlier and take the time to enjoy the journey. Your child will be delighted, and you will welcome this peaceful change of pace.
How to Make Owly Toast
The most important parenting advice I can give you is to give your child a sense of belonging, responsibility and contribution. Since they were very young, my sons always made me tea and snacks, helped me cook and clean, and felt needed at home. They felt they had a lot to contribute, and that I counted on them. I can tell you more about that in another article, but for now, I can suggest this activity as a way for your child to gain many of those skills by making their family’s snacks. You are busy working, keeping the house clean and playing with your child. Your child is growing and in need of stimulation – constantly. This is easy when they are at school, but at home?
One way to show them how they can contribute is asking them if they could prepare “owly toasts” for the whole family, to have with snacks. If your child is a cefa student, Owly (our mascot) will also have a huge sentimental value to them.
How to Make It
Supplies
- Bread or bagels
- A toaster (to toast the bread if you wish)
- A nut butter, cream cheese, or any spread you normally have
- 1 banana for 4 people
- 2 strawberries per person
- 4 or more blueberries per person
Let’s get started!
- Your child can, with your supervision and if old enough:
- Toast the bread or bagel (self-help skill)
- Spread the nut butter evenly (fine motor skills and S.T.E.M.)
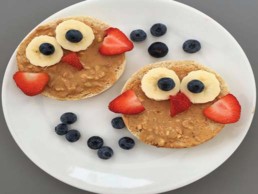
- Cut the fruit as in the picture (fine motor skills)
- Calculate how much fruit is required per slice (S.T.E.M. - mathematics)
- Make an owl using the fruit as per the picture shown (fine motor skills, S.T.E.M. and social and emotional development)
- If your child is younger, you can leave an image of the Owly toast in front of them for guidance (a little like you would the picture of a puzzle as guidance for them to make it)
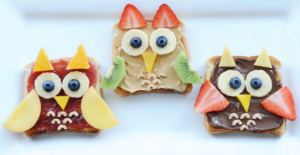
If you have more fruit and decorating items at home, here are some other ideas:
Learning Opportunities
Children will learn S.T.E.M., fine motor skills, but more importantly, social and emotional development skills. Your child will:
- Have the opportunity to contribute to their family by preparing a snack for their family
- Know that they are helping you at home with important work
- Gain cooking skills
- Gain a great amount of self-confidence and empathy
While they are preparing the snack and you are supervising, make sure you tell them that this really helps the family, as you have more time to finish your work, and thank them. Tell them how proud you are of them that they are able to cook for the family on their own, and once you taste it, tell them how delicious it is! Ask them what they can make next time for the family. The rest of the family (especially siblings) should of course thank them for the meal.
Get them to deliver the snack to each member of the family, with a napkin and a glass of milk for extra learning! It is a difficult task to balance a plate across the kitchen, pour the milk and carry that too, but these are essential self-help skills your child must learn. You might have to show them where to find the mop and paper towels too.
CEFA tip: Remember to let your child do as much of the process as they are capable of. This means they cut (they can use a plastic disposable knife), spread, wash, plate and deliver.

How to Make a Homemade Xylophone
Music is an integral part of a child’s life. This activity is great because, firstly, it’s very inexpensive if to try at home, secondly, it is great as an indoor activity and an outdoor one, and third it combines music and S.T.E.M..
You can create a rainbow water glass xylophone, or just use water in the right proportions, without the colours. The colours are so beautiful though and give you colourful shadows to play with if you set your xylophone near a window!
How to Make It
Supplies
- Water
- Measuring cups (these are easy to handle by children, and easy to store)
- 8 identical glasses, wine glasses, mason jars or bottles
- Various spoons to play the xylophone with once it is done. Try a wooden spoon, a metal spoon, a plastic spoon and compare the difference of sound with your child. You can also try chopsticks, drumsticks, and anything else your child is interested in trying!
Optional Supplies
- Food colouring – you don’t need it but it makes it so much interesting to look at!
Let’s get started!
- Arrange all 8 cups in a straight line
- In the first cup, pour ¼ cup water
- In the second cup, increase the amount by ¼ cup, making it ½ cup
- Keep increasing the amount by ¼ cup for each cup until you get to the last glass
- Once you have the water in the cups, you can either play with the xylophone, or colour it with a few drops of food colouring in each cup.
- You can use any colours you like, or;
- You could add the same colour but with more intensity with each cup, to have a gradation
Things to Keep in Mind
Make sure you do this experiment on a surface that is easy to wipe if you use food colouring.
How to Explain It to Your Child
- When you tap the glass, the water inside the glass vibrates
- These vibrations move through the air and into our ears, which is what we hear
- The sound it makes depends on how fast or slowly the vibrations occur
- Water slows down the vibrations of the glass; therefore
- The more water a glass has, the lower the pitch of the sound
- The glass with the least water produces the highest pitch sound because the vibrations are the quickest
I found a good video that explains the process to children in a fairly simple and accurate way. If your child is younger than five, you may have to pause it at times and go over the information with them.
If your child is too young, or simply not interested in knowing how sound travels, it’s perfectly ok! There is plenty of time in life to learn about how sound travels. Your child might simply enjoy playing with the xylophone, or might only have a few questions about the experiment, and that is great! As long as you are introducing new experiences to your child that cause them to reason, question, think and explore, your child is learning. If your child, however, has many questions and is interested, then I encourage you to explore the subject more in depth J
Learning Opportunities
Children will learn S.T.E.M. as well as music . They will learn about music when they’re learning how sound waves travel, how different notes are made, and also creating their own music once the xylophone is ready. Making the xylophone is the S.T.E.M. challenge, as they will be learning science, engineering and math while they measure, pour, test, fix, and figure out the process. S.T.E.M. questions to ask:
- Do you think each glass will sound the same? Why?
- Which glass will have the lowest pitch? Which will have the highest? (you can write down their hypothesis before they test it)
- Will it sound the same if you tap with a wooden spoon or with a metal spoon? What is your prediction? Why?
- Will it sound the same if you tap the glass from the side rather than from the top? Why?
Once they finished exploring the xylophone, they can try to figure out how to play different songs on it. Try Twinkle, Twinkle Little Star or another childhood favourite.
CEFA tip: Remember to let your child do as much of the process as they are capable of. This means they pour and count, and they try to figure out how the songs are played.
Extended Learning Opportunities
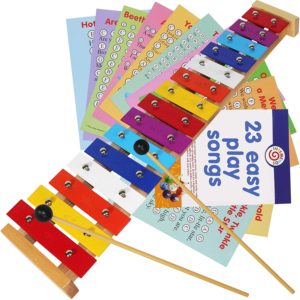
Provided you haven’t just used all your drinking glasses, you can keep the xylophone for as long as you wish. If you would like to continue the learning around music and xylophones, I recommend these toys, which require less supervision. Click the images to see where these items can be purchased.
For 0-5 year old children:
For 3-5 year old children:
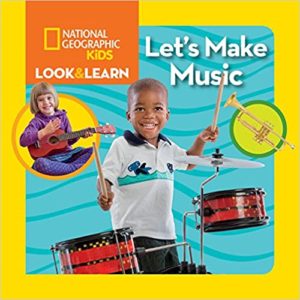
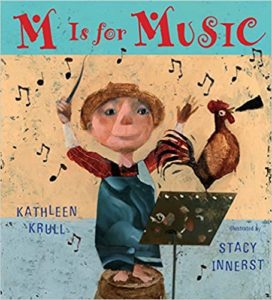
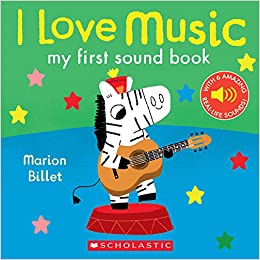
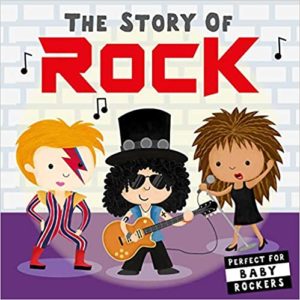
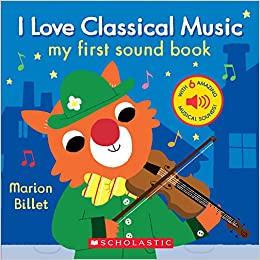
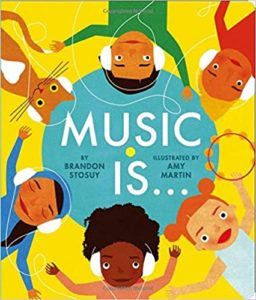
Books You Might Like
In order to truly understand these concepts, it is always best for your children to have as many hands-on activities and manipulatives as possible. For this subject, an activity that they can touch, feel and play with is so much better than a worksheet or book. If your child really has a passion for the subject, or if you need an activity that is educational but does not require as much supervision, then books or workbooks can be fun! Plus, it really depends on your child. Some children love working on workbooks (I was one of them) and can find them entertaining for hours on end, while others prefer real objects. Whatever your child’s preference may be, make sure you always provide manipulatives (rather than only workbooks or activities on paper). Trust me on this one.
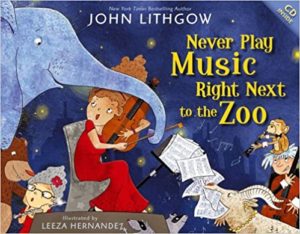
Books I recommend for you and your child
Reading is one of the most important activities you and your child can do together. In my article, ten ways to help your child be an excellent reader, I share why reading is essential, and tips to make reading time count.
I’ve always had a big library at home, for myself as well as for my children. As my sons outgrew some of their books, I kept their favorites for them to read to their own children one day, and some I gave to our cefa schools. Many books were lovingly passed on by my children to their cousins and to their friends, and many they donated with great pride to their school library.
Books are a great investment, especially at that age, because children love to read and re-read the same book many times over. They also learn to use books as resources, like we do as adults. You can also borrow books from the library, and only buy those you find your child especially loves, or the ones (like an atlas) they will want to refer to over the years.
Below are some books I recommend for your child’s library.
Good Literature for Children
Books That Foster Empathy, Mindfulness and Personal Development
Inspirational Books and Biographies
Academic Books
Generic Workbooks for Junior Kintergarden
10 Ways to help your child be an excellent reader
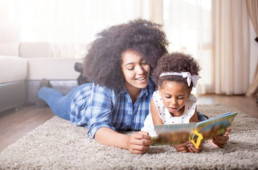
Reading is one of the most important habits to instill in a child. It will increase their vocabulary, which will directly improve their performance at school. Reading will also expand their knowledge in every other area and open their minds to so many possibilities! Because children mainly learn the technical phonetic combinations at school where they focus on the practical side of reading, the love of reading is best fostered at home, and supported by you, the parent. Remember to focus on fostering a love of literature, and many other aspects of reading. In general, and especially when children reach elementary school, the focus is on knowing how to read, not loving to read.
When children are little, take the time to read to them every night, and delight in the stories you discover together. To make that time even more special, here are 10 tips you can use:
1. Take the Time to Look at The Images Together
Instead of just reading the words in the book, look at the images with your child and see what they tell you. This will teach your child to look for cues in the images that tell them what is about to happen in the book. Using this strategy will help your child increase their vocabulary by helping them “guess” what a new word means, just by understanding its context. This is one of the main reasons why children’s books are illustrated.
2. Use Different Voices for Different Characters in a Book
By making a special voice for the ogre of the story, then for the little girl he meets, and all the other characters, you help your child imagine the story, making it come to life! Once your child begins to read, even when they are not reading aloud, they will, in turn, adopt the habit of giving book characters their own voice, their own life. This will greatly increase their reading comprehension skills, foster their love of reading, and expand their imagination and creative thinking skills.
3. Follow with Your Finger
If your child is just learning to read or is an inexperienced reader, it helps when you follow with your finger as you tell the story. This will show them that, in the English language, we read from left to right. It will also help your child discover that every word you are reading is there, on the book, and once your child is beginning to read, they will start visually recognizing whole words. This is like watching a movie with subtitles. You don’t need to read the subtitles if you understand the language, but you tend to want to read them anyway.
4. After Reading TO Your Child, Read WITH Your Child
When your child is beginning to read alone, make this a great bonding experience by spending time with them while they read. Many parents put a lot of effort into teaching their children to read. They read to them every night until they learn to do it alone. As soon as their child learns to read on their own, parents usually stop reading to them, expecting their child to read on their own instead. Even though your child can now read, they will miss that time with you and will not feel as excited or enthusiastic about reading once you are no longer part of that special shared time.
My recommendation would be to continue sharing that special time with your child. You can take turns reading books to each-other (you can read one evening and your child can read the following evening), or take turns reading one page each, or even each reading your own book together when your child is older.
My sons are now adults, but we always had the habit of reading together in the evening. We would sit in the living room and each bring our book to read. Sometimes we would read the same book together – our favorite was an atlas of the world. We would choose which places we wanted to visit, and share what we learned.
Choosing a time to read as a family (or just you and your child if you can’t get everyone on board) shows your child that you love reading, and that you value it.
5. Go Out with Your Child to Buy A Special Book
Make it a time you spend together, just the two of you. Take your child to the bookstore and tell them you would like to buy them a book; one that they choose. Bookstores have a special feeling to them and are wonderful places to spend time looking around. Your child will love the experience so much that they will remember that happy day each time they read their new book at home.
I understand that buying a book is not in everyone’s budget, but fortunately, you can share a similar experience by taking your child to the library and choosing a book to borrow! The idea is to spend the time together in an activity that values reading.
6. Reference the Stories You Read Together
Casually in your conversations, refer to the stories you read together with comments such as “It’s like that rabbit that we read about in that story, remember? When he couldn’t get out of his home?”. This will help your child make their reading experience more valuable and relatable and learn to enrich their personal life with the things they learned about, or just experienced through the book.
7. Write A Special Message
When giving your child a book as a gift, write a special message on the inside, sharing with them how much you look forward to sharing this book with them, or how proud you are that they are reading so much or so well. This will strengthen the bond between the two of you and make the habit of reading even more enjoyable for them.
When my son was born, my sister bought her favorite book for him. She wrote a message inside, telling him she hoped he would love the book as much as she did when she was little. What a treasure for your child to have your family’s favourite books in their collection, all with a personal dedication!
8. Read in Front of Your Child
Children learn by example. Take the time to cozy up and read at home every so often, a book that you really enjoy reading, or even the newspaper. Children will see reading as a part of life and will tend to do the same. If you enjoy reading, they will learn to enjoy reading just by watching you.
9. Share Your Books with Them
During dinner time, or at any time throughout the day, share the things you read about in your books or the newspaper (using common sense of course) by saying things like “This book really made be think about…” or “I loved reading the part where this happened, it reminded me of …”. When sharing with your family about something you read, preface it by saying “I read today that …” so your children see other positive examples of how reading enriches your life.
10. Read Your Children’s Books
I will never forget the day my then-10-year-old son, having just finished reading a 400-page novel, passed it to me and said, “You should read it mom. I’m sure you’ll love it. It has a really emotional part in it.” I was bursting with pride that he was so enthralled in his novel, but what I realized that day was that our bond was so strong, and we had spent so many years reading together and talking about our books, that he knew which books would appeal to me. I could see the confidence in him that reading created, knowing that he was now reading books that were more complex, not simple picture books or children’s stories, and that he felt they were mature enough that he could recommend them to me.
Literacy is the most important skill. Take the time to foster it at home in a way that will make it fun and appealing to your child, so they will enjoy a lifetime of reading and literacy.
As published in NY Metro Parent December 2016.
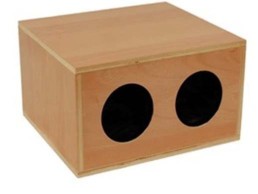
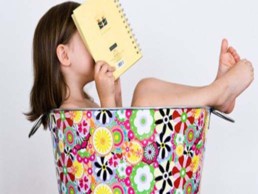
Mystery Box!
The mystery box is always a favourite. You can make it out of any box, or even use a bag instead! All you need is space for your child to put in both their hands.
What you do is place some familiar objects in the box, and your child will try to figure out what objects they are holding by using their sense of touch only.
You can also use 3D shapes in the mystery box. Children can learn how shapes feel by trying to figure out which shape they are holding in the mystery box, which is a sensorial way of learning about shapes.
The mystery box can be used over and over again, and can be played outside as well as inside the house!
How to make it
You will need
- A box or bag.
- Paper for your child to draw or write (see below).
- Objects you find around the house. Good objects to try could be:
-
- A key
- An orange
- A spoon
- A piece of Lego
- A hairbrush
- A hair tie or elastic
- A shell
- A toy
- A sponge
- A smooth pebble
- A rough pebble
- A piece of felt
- A colored marker
- A piece of ribbon
- A button
- A clothespin
- A bead
- A pompom
- A shoelace
Let’s get started!
- Make two holes in the mystery box for your child to put their hands through when guessing what objects are inside.
- Your child can decorate the box if you wish. Try paint, crayons or wrapping paper.
- Without your child seeing what you put in, add some objects to the box. Once they are in, your child can start guessing what they are.
- Celebrate the wins and fun of trying!
Learning opportunities
With this sensory activity, children will learn a lot of language (in describing what they are feeling), including math language when describing attributes like soft, rough, shapes, etc. Although this may not seem like a reading game, it really does a lot for your child’s reading and literacy skills, as these improve with increase in vocabulary.
Describing while using vocabulary is one of the most important learning outcomes at this age. It teaches them reading and mathematics.
CEFA tip: Work with objects that your child can guess at first, increasingly making it more complex. You can even start with just one object if your child is young, and say, for instance “Guess what is hiding in the mystery box...” And you can give clues, like: “Is it baby’s bottle? Is it baby’s blanket?”
Extended learning opportunities
- You add writing skills by having your child draw the objects that they find (fine motor skills, pencil grip practice) or write the names of the objects they find.
- You can play a nature version of this game by hiding things that you find outside in the box, like a pine cone, a leaf, a rock, a seed, etc.